Showing posts with label campaign. Show all posts

October 22, 2014

DIY: Typographic Glitter Tattoos

This post has been sponsored by Blueprint Social and ILTC. All opinions are my own.

I recently got the chance to try out Tulip Body Art's glitter tattoo kits and I must say they're so fun to use. The professional quality paints and glitter kits they have are perfect for Halloween - whether you are aiming for a cutesy outftit or a full-on scary attire. They have tons of different colors available and if you're not good with make-up (as I am), you can always get their stencils (which I have snapped a photo of in this post). As you all know, I always go for the cutesy Halloween stuff over the scary ones, so I guess it's no surprise for you that I came up with this idea - I guess this is more typographic than cute, but still Halloween-y, am I right?


Supplies
  • Contact paper / Vinyl scraps
  • Stick-on letters
  • Tulip Body Art Glitter Tattoo Kit

First, cut an 'explosive' pattern onto your contact paper or vinyl. You can sketch out how you want this to look like, but make sure it's bigger than your stick-on letters. Alternatively, you can have a die-cutting machine do it for you.


Stick it onto your desired tattoo location - I chose to model these on my little sister's hands as it's easier to take photos of her hands than mine. 


Place your desired text onto the middle of your 'explosion' pattern. 


Fill in exposed skin with body glue, working fast to cover the whole area. I find that it doesn't dry that quickly, but still - make haste.


Using the brush provided in the kit, add your glitter. Doing this part was really fun!


Peel off your stencil - using a pointy object to take off the letters part and you are done!


I was pleasantly surprised that this doesn't wash off easily with just water. It's guaranteed to stay on your skin until you actively try to wash it off! It's awesome. 


I really loved the color of the copper glitter, but the text shows up better on the black. What do you guys think?


Don't want to bother with making your own design? Tulip has a ton of stencils to choose from - from they have some included in their glitter tattoo kits and some you can purchase separately. Check out what other bloggers did with Tulip Body Paint! 


What other phrase would you use for Halloween? Don't forget to follow I Love To Create for more information regarding their products, promos and general awesomeness:


"

June 19, 2013

DIY: Beehive-Pattern Photo Display - A Shutterfly and Looksi Campaign

This post has been sponsored by Shutterfly and Looksi Square. 
Yes folks, my first sponsored post! From here on, all my sponsored posts, reviews and product giveaways (if there will be any) will be hosted on this second site.

If you've been given free prints, what are you going to do? I was recently given some free prints by Shutterfly & Looksi for their campaign entitled 'What Can You Do With A Print?' With printed photos, some creative cutting and a few other materials, you too can make this Beehive-patterned photo display.


So, again, I ask you, what are you gonna do if you're given free prints? 


I was mulling around a few ideas before settling into this. Why this? 
Well, first of all, I was really apprehensive of cutting photos that I paid for printing - I know, I'm kinda stingy like that. So this was the perfect opportunity to experiment on something - I totally didn't know how this was going to turn out but I like it. 
Second, I am in love with that beehive pattern right now and I wanted to incorporate it to my room decor. 
Third, I wanted more photos of me and my future-hubs on display, but I didn't want a traditional-looking one.  

Okay, enough chatter. If you wanna make something like this, here are the things that you will need:
Photos - in black and white looks best, but in hindsight, I should've edited the photos and put a common filter over them before having them printed. It would've probably looked better.
Template - you can make your own, or download mine from here. Fits 4" x 6" photos (or bigger).
Scissors
Pen
Hot glue
Foam board - in white, preferably 
Fabric covering of choice
Black paper

Get your photos ready. Print your template (get it here) or make your own. In total I had 15 grayscaled photos. You might want to add 2-4 more depending on your preference on the hexagons cut in half to put at the top and the bottom. 
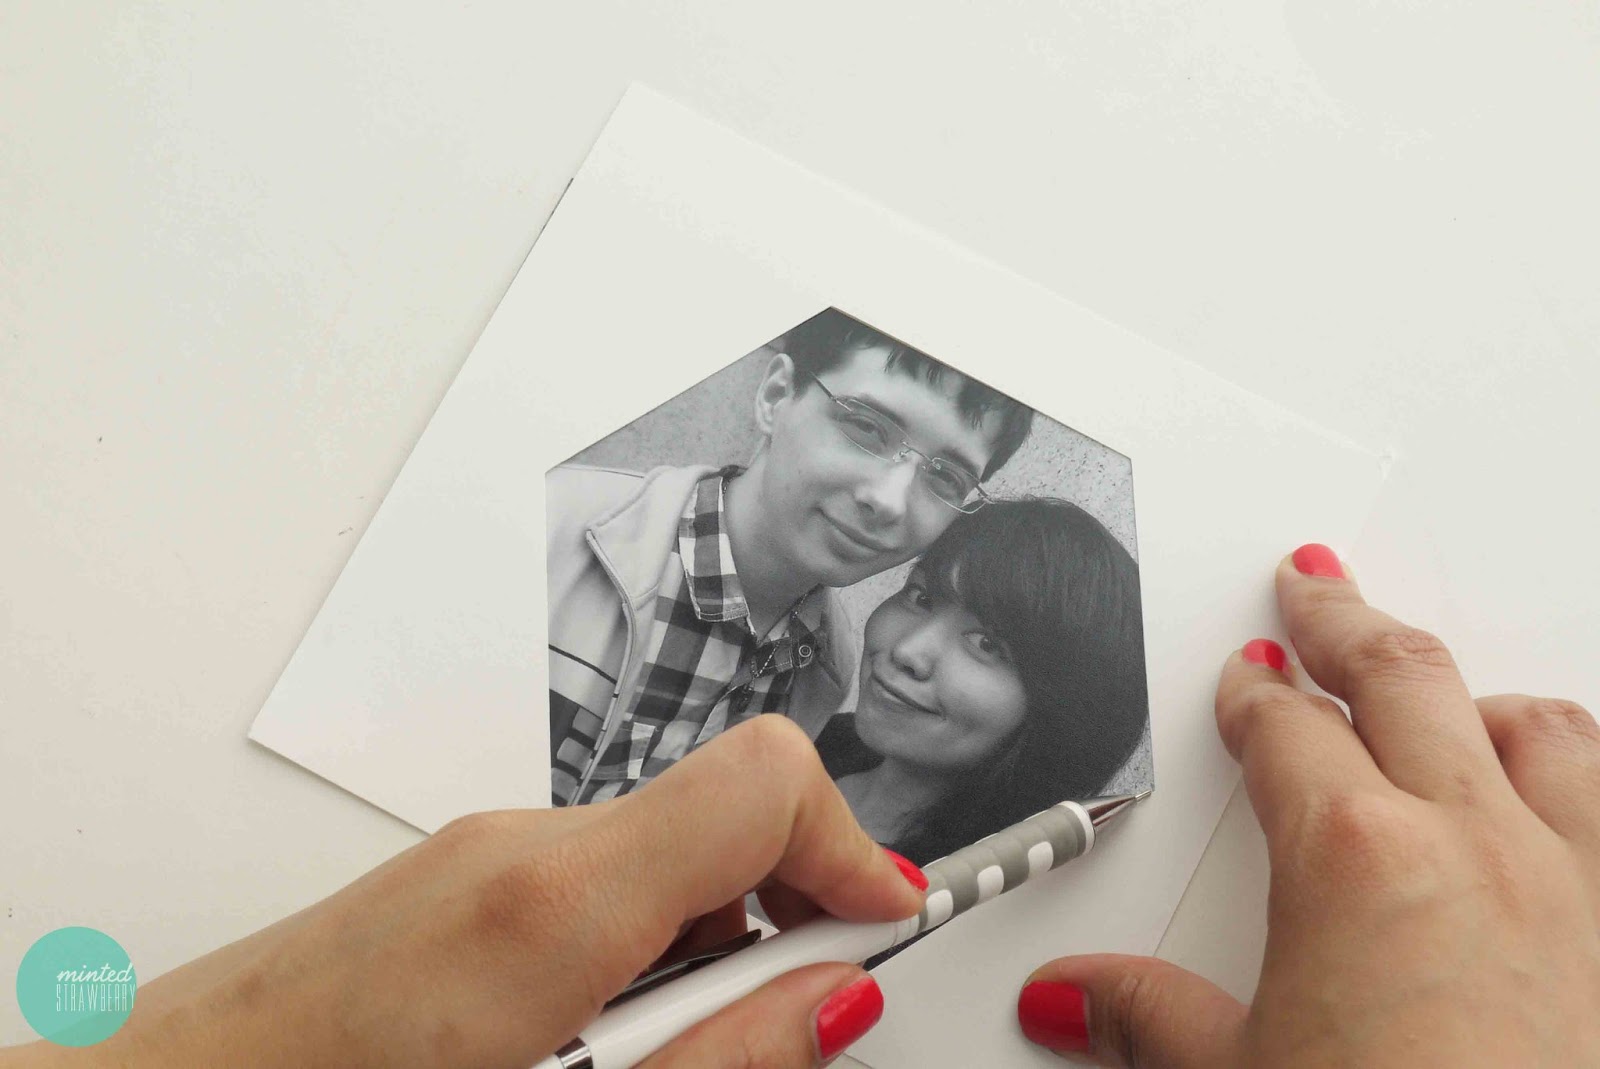
Put your template over the photo and then trace, centering your desired image. The template that I've provided will hit the top and bottom of your 4" x 6" photo so you only have to trace side guidelines.

Using your guideline, cut up your photo into a hexagon shape.

Now, take your foamboard and cover that in your fabric of choice. Always remember to iron your fabric before covering something with it - you don't want your project to end up having tons of wrinkles, right? We're aiming for perfection here people. Haha!

Layout your photos and gauge how far apart they'll be. When you're happy with your layout, glue them down. I suggest gluing down the left side first, measuring every now and then for straightness. Work your way to the right, starting with the top and bottom ends of each column each time. Was that confusing? Haha, sorry! Anyway, I used white glue to stick my photos down. It's easier to move them if you're not happy with the placement. I put that 'For Like Ever' hexagon highlight cause I thought it would look cute. It's also in the template download, so get that there if you want it too. :) 

Aaaand there you have it! I love that it's simple and unique at the same time. Don't you?

Please excuse our derpy faces and the subpar quality of photos! Hahaha.
So folks, there you have it. Would you make something like this? What do you think would make this better? Of course leave me your thoughts in the comments box as always and I hope you have a lovely lovely day. :)


Looksi and Shutterfly have invited me to participate in a creative brand collaboration.  I have been provided with product compensation for this post, but all opinions are my own.


"
Join me on Facebook Follow me on Pinterest Follow me on Google+ Follow me on Bloglovin Follow me on Instagram Follow me on Twitter Subscribe to RSS