Showing posts with label craft. Show all posts

November 12, 2015

DIY: Washi Tape Printed Pouch + Washi Tape Crafts Book Review

I was sent a copy of the book to review, but all opinions are my own.

Washi tape is one of those things you collect and collect and then realize you have a lot of. There are a lot of uses for them! I mostly just use them to decorate notebooks and my planner these days - but I was recently sent a copy of Washi Tape Crafts (Workman Publishing) written by my friend Amy Anderson (amazing woman behind Mod Podge Rocks) to review and let me tell you - it has re-ignited my passion for crafting with these fun paper tapes. I'm sharing with you a project I made that was inspired by one of her projects in her new book - let's jump in!


Supplies:
  • Washi tape in different prints
  • Iron-on transfer paper
  • Iron
  • Paper + Pen
  • Scissors
  • Pouch
  • Scanner

Start by making or purchasing a pouch. I quickly sewn one up for this project - but you can definitely get one at the craft store or sometimes even Target's dollar spot section. Roughly trace the shape of your pouch onto a piece of printer paper. It doesn't have to be exact - you just want to know the rough width and height of it.


Collect the washi tapes you want to use. I used some of the pretty washi tapes that came with the Washi Tape Crafts book and some of my own.


Build your washi design onto the paper. The book comes with 10 different washi tapes, and they're all so cute. I am so in love with the pink sprinkles one! You can reposition the tapes until you achieve your design.


Scan the image onto your computer and print it onto iron-on transfer paper. I couldn't resist and added a sentiment to it - to add one on yours, simply use any image editor and type your sentiment in! If you are using iron-on transfer for light fabric, flip your image before printing. You don't have to cut right up to the design either, as the transfer sheet becomes transparent on the white areas. If you are using iron-on transfer for dark fabric, DO NOT flip your image - you will want to cut as close as possible to the design as well, leaving no blank areas.


Iron your image according to the transfer paper package's instructions. You need to be patient with this - I can't stress it enough! I've had a few projects fail because I wasn't putting enough pressure, ironing it long enough, etc.


Peel off the paper slowly after it has cooled. And voila! You are done. Isn't it pretty?


If you want a darker/brighter print, I suggest using iron-on transfer for dark fabric, as it is opaque and would make the tape pop more. But I love how mine turned out! It's a perfect gift for my little sister who loves crafting as much as I do. 


I really love this project - and I wouldn't have thought of it had I not been inspired by one of the projects in Amy's new book.

Amy Anderson's Washi Tape Crafts from Workman Publishing

Don't forget to check it out - Washi Tape Crafts (Workman Publishing) - it's chock full of different ideas you can make with washi tape! Plus just the 10 washi tapes with it are so pretty too. It's a great gift for any crafter or planner junkie. What do you like making with your washi tape? Let me know in the comments - and of course, happy crafting!


"

March 21, 2014

DIY: Stenciled Bee Coasters

This post has been sponsored by Plaid Crafts. I was provided materials and/or compensation, but all opinions are 100% mine.

Today I'll be showing you how I made these bee coasters using Ed Roth Stencil1 stencils from Plaid Crafts (they're available at Jo-Ann Fabric & Craft stores). I am not lying to you - when I got these stencils from the mail, I squealed. I am obsessed with a lot of patterns - the beehive pattern being one of them (remember this photo wall art?) and I was just lucky enough to get them!


My mind swum with what I could do with it - these stencils are large enough to cover large spaces such as walls or pretty big canvases, but I know I don't have the patience to do something like that yet. So I made a couple of things - a set of coasters was one of them. I wanted to try the bee stencil too - it came with a base stencil and a detail stencil and I just found that so cool (because I'm not really one for free-handing details).


What I used were the following:
Coasters
Ed Roth Stencil1 stencil (the beehive one)
FolkArt multi-surface paint
Gold spray paint
Sponge brush
Small paintbrush


First, spray paint your coasters. I used gold as my base, because I love gold (no surprise there :3). Next, take your bee base stencil, position it on your coaster and fill it in with paint. These FolkArt multi-surface paints can be used for indoor/outdoor purposes and on a variety of materials - honestly I love FolkArt paints, they're what I use for most of my projects.


Next, take your detail stencil and position that on top of your stenciled bee base and stipple with a dry brush loaded with just enough contrasting paint. Tip: spray the back of your stencil with some repositionable adhesive (don't spray too much though or you'll end up with something like the photo below when you pull it off).


Since I was too trigger-happy in adding repositionable adhesive, I got some bald marks when I pulled my stencil off. But no worries, there's a solution for that!


If you ever end up with bald marks, fill them in using your base paint and a small brush.


For added detail, I used the honeycomb stencil to add some hexagons on the coaster- filled it in with a light color without washing my sponge brush (hence the grungy, grey-ish white effect that you see). Don't worry about that messy stencil - it's easy to clean. For a glossy effect, you may want to spray it with some clear glaze.


And there you have it! These bees are just in time for Spring, don't you think? I love that it looks so street-arty. Now all that's left is to package it nicely if you're giving it to somebody - and yes, pun intended :)


Hope you enjoyed this project, and don't forget to pin/share if you did! And also, check out these other projects using Stencil1 stencils - see all the awesome designs that they have!


Don't forget to follow Plaid Crafts for more awesome project ideas, inspiration and more!


"

January 19, 2014

DIY: Rearrangeable Magnetic Board + A Consumer Crafts Prize Pack Giveaway!


This post and giveaway has been sponsored by Consumer Crafts. I was provided some of the materials for the post.
Everybody seems to want to organize in the first month or so of a new year. I seem to have that urge too, albeit a bit late. This was relatively easy and inexpensive - I found my magnet board a few months back at Target for just a dollar. Also, since it was relatively small (a bit bigger than letter-sized paper), it fit just right into my desk set-up, which was a good thing for me (since I like things being within reach). Check out the tutorial plus enter to win an awesome prize pack from Consumer Crafts!


Supplies needed:
Magnetic Board
Spray paint
Pretty wrapping paper
Magnets


If you have a printed magnetic board like I did, spray paint that with the color of your choice. To go with my pretty wrapping paper (which I got after Christmas at Target), I sprayed mine gold. While that's drying, cut down your paper to the size of your magnetic board. Mod podge it to your board when it's ready. Mod podge it again and seal with a clear acrylic coating to make it more durable.


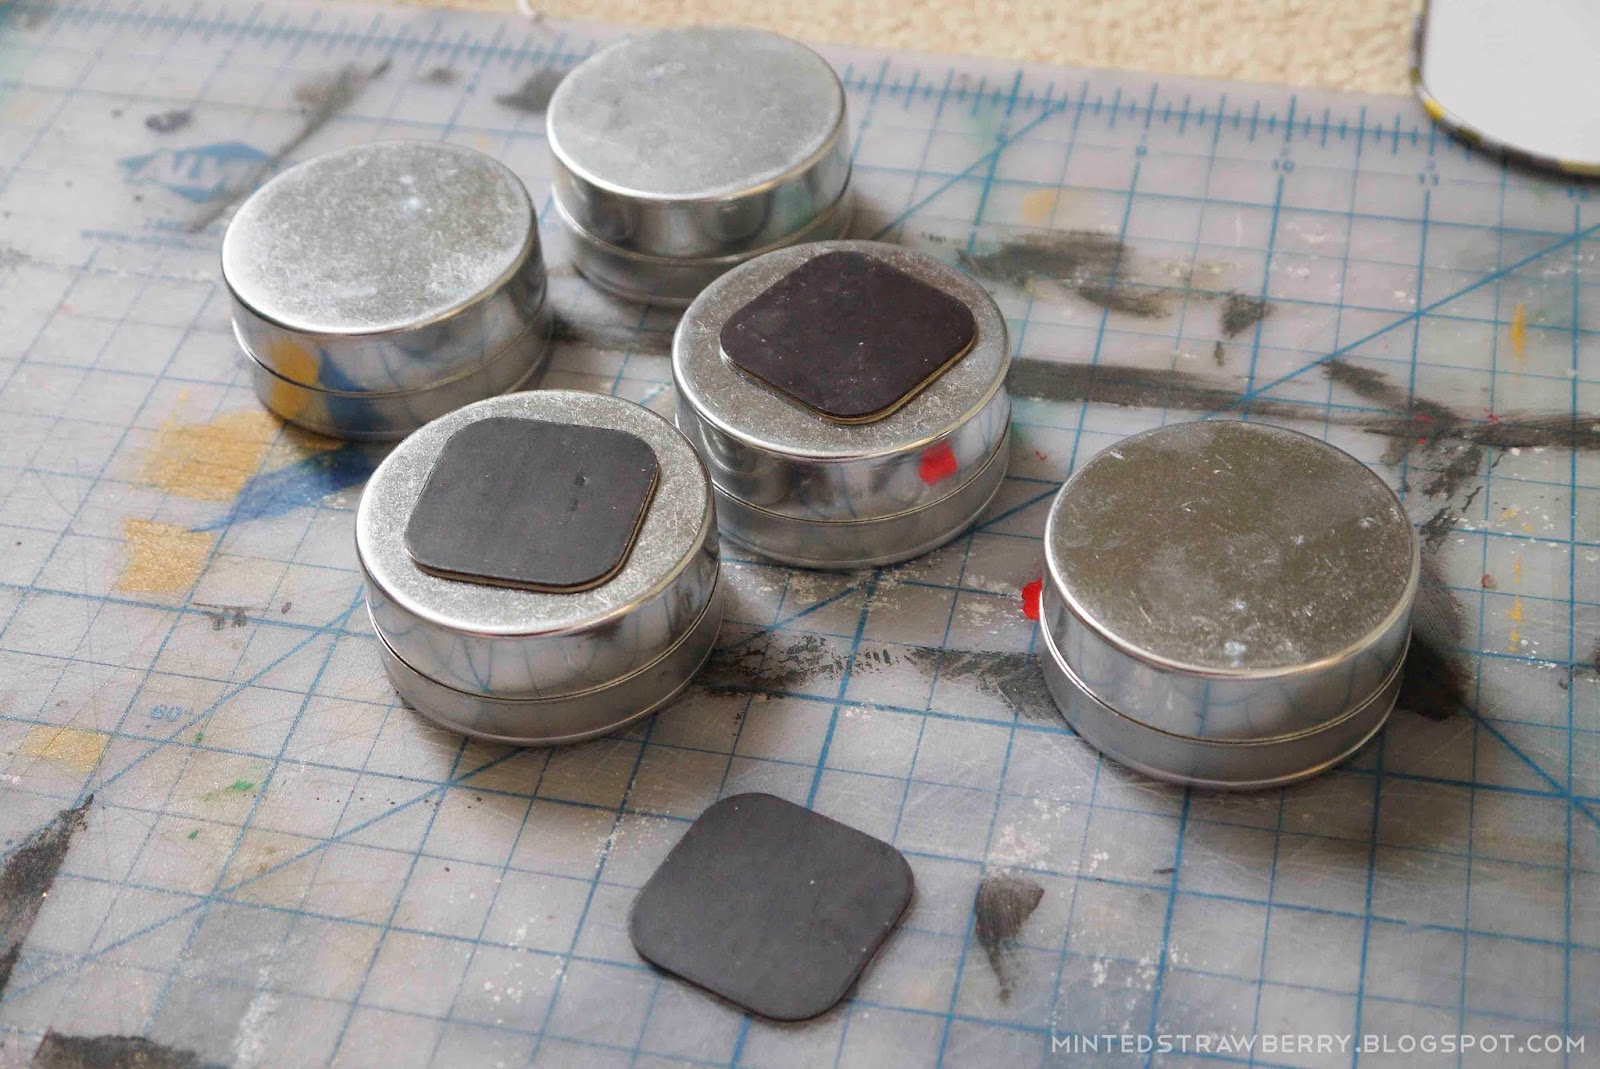
Get your tins and attach magnets on their bottoms. Why need tins? Well, I wanted something to hold my plethora of tiny desk accessories. :3


I used mini chalkboard tags as my header markers.


I hot-glued magnets on the backs of the clips. These are handy as I can use the clips to hold notes and paper (I like writing my schedule for the week down on a piece of paper as opposed to a planner sometimes so I'll actually see it). 


Then all that's left is just arranging them onto your board. I love the fact that it's very versatile and I can add/remove elements as needed. 


Want those tins and those adorable little chalkboards? Win those and more by entering below!

a Rafflecopter giveaway

Also, don't forget to visit these blogs for other ways to organize your year! Click on the photos below to be redirected to their lovely blogs.

DIY Mini Tin Calendars from A Nest for All Seasons
Menu Planning with Washi Tape from Onelmon

Memo Washi Tape Flags from Agus Yornet
10 Travel Uses for Favor Tins from North Story
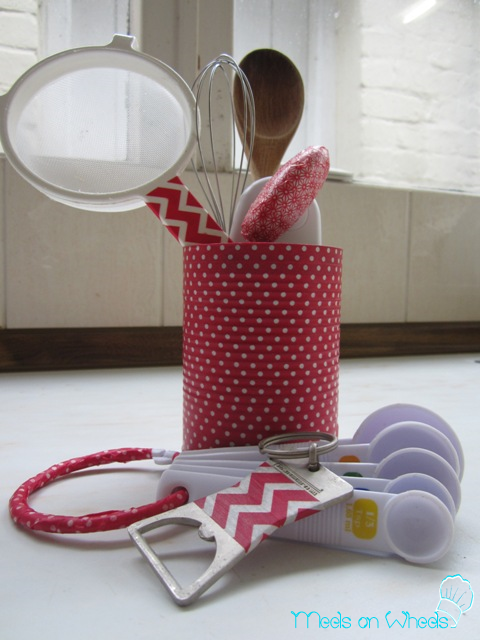
Washi Tape and Metal Tin Organization from Meels on Wheels
Washi Tape Twist Ties from Tikkido
Good luck and happy crafting - hope you guys win! :3

Linking up here:
 
"

July 5, 2013

{Styled} by Tori Spelling - Customize your Own Jewelry in Minutes

This post has been sponsored by Darice, Inc.  I was provided these items for review, but all opinions are my own.


I think everybody who reads my blog knows I'm obsessed with jewelry - more than half of my DIY tutorials are about those pretty little things (or big, in-your-face ones, depending on your preference). So imagine my happiness when I received a big box of goodies from Darice - mix-n-match jewelry components from the Styled by Tori Spelling line - available exclusively at Jo-Ann Fabric and Craft Stores.


My box of goodies. I nearly died when I opened it.


This line offers everybody the opportunity to be their own jewelry stylist - you can make a necklace or earrings in a few seconds. Mix and match the jewelry parts that you like. You don't even need any tools - yes, friends, even my own little sister can make jewelry on her own. Thinking it's not your style? Don't you worry - these babies come in a ton of different styles to choose from. Anyway, it's really really easy. Do you think I'm kidding? Well, watch  the magic happen:


Isn't it so easy to make pretty dangling earrings? I also love that you can switch it out in a jiffy if you so please.


And the necklace bottoms - they're all so pretty I can't wait to get more to add to my collection (as if I need more jewelry, heeeheee).


You can always use some of the necklace bottoms as bracelets - they make really good statement cuffs. Or use earring components as pendants... or use pendants as earring components. There are so many possibilities! Of course, since I wanted to personalize mine a bit more, I busted out my jewelry making supplies and added a few more chains to this glamorous statement necklace:


I love how the added chain makes it feel less Hollywood glam and more versatile for casual outfits. For those curious about how I added it - I just closed up a 30" length of chain, added my own 'connectors' per segment (eyeballed it) and attached. 


In keeping with the convertibility of this line, I used tiny lobster clasps to attach the chain to the back so it would be easier to unhook the chains if I want my Hollywood glam necklace back - you know, for special dressy occasions. I have these clasps in the middle in case I want to add a charm or an extra something to give my necklace more oomph than it already has.


In summation: For folks who don't have time or skill to make jewelry from scratch, this will give you the option to still make your own. For more experienced jewelry folks, well - this line gives you cute components to customize as you please! And of course, these will make fun giveaways for crafty tween/teen parties. 


But wait, there's more! Darice Crafts is giving away a box of Styled by Tori Spelling goodies valued at $50 - $75 to one of my readers! Isn't that just superb?! Giveaway is open to US residents only. Use the Rafflecopter entry thingy below to enter:

a Rafflecopter giveaway

Don't forget, the new Styled by Tori Spelling line is available exclusively at Jo-Ann Fabric and Craft Stores (Hint: check it out now!). Good luck with the giveaway. And ...that's it for now, folks!
Linking up here:


"
Join me on Facebook Follow me on Pinterest Follow me on Google+ Follow me on Bloglovin Follow me on Instagram Follow me on Twitter Subscribe to RSS